
- Effigy Bodies Part One: The Pattern & Materials
- Effigy Bodies Part Two: Cutting & Sewing
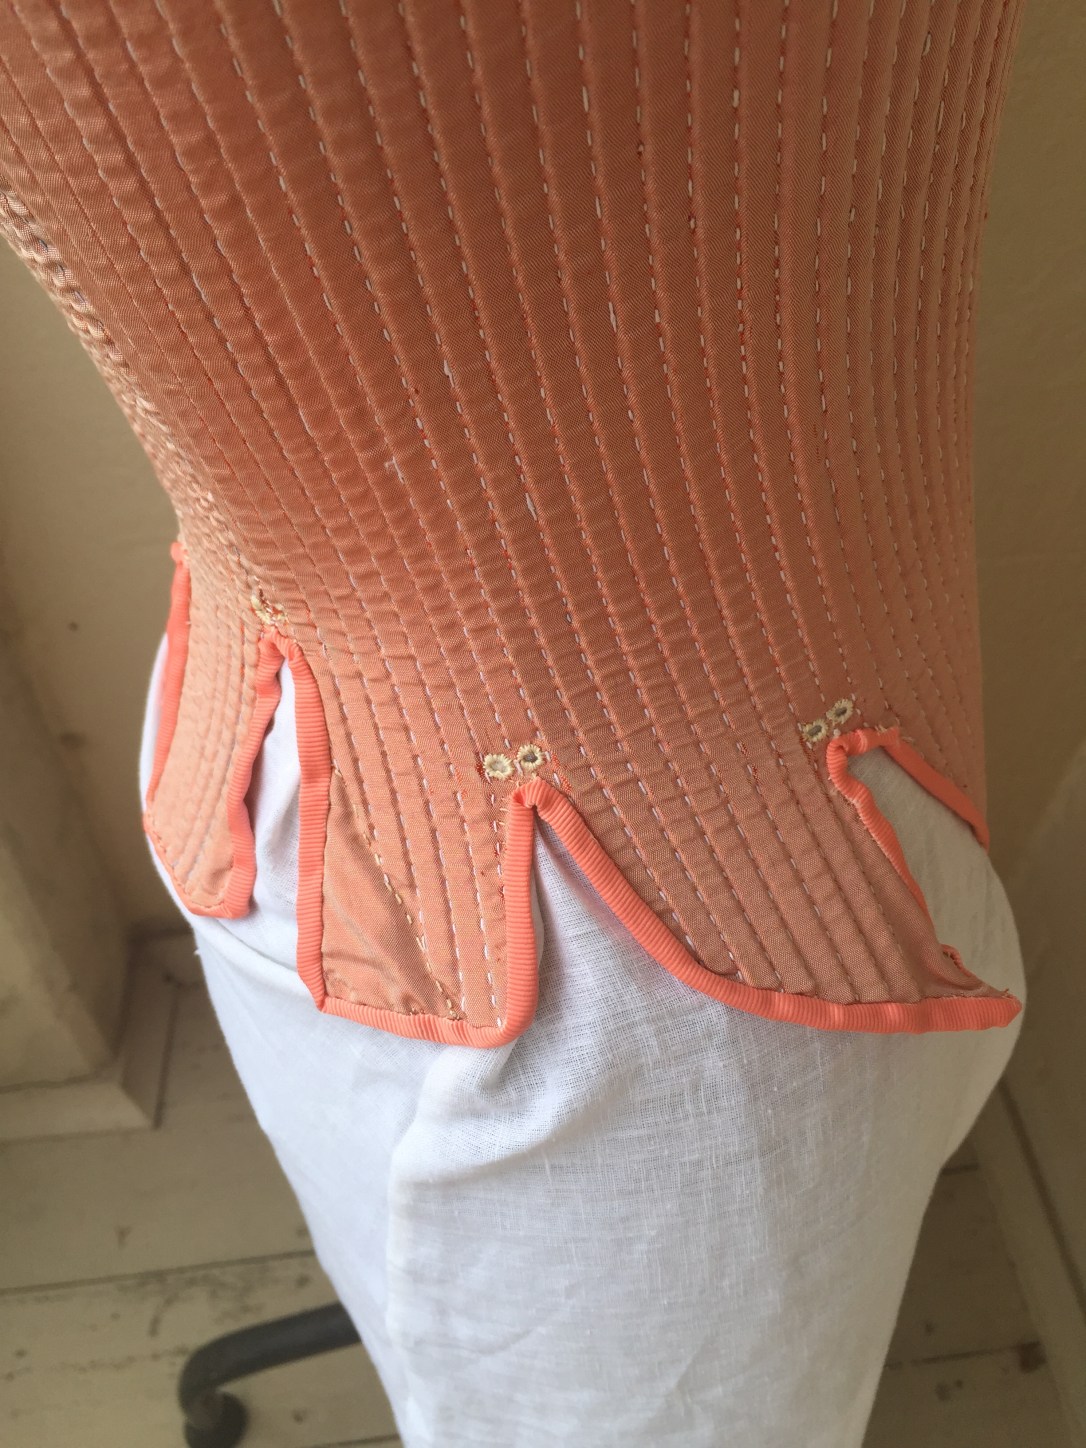
- Effigy Bodies Part Three: Boning & Binding
- Effigy Bodies Part Four: Eyelets & Lacing
- Effigy Bodies Part Five: The Finished Product
Without further ado, I present my reconstruction of Elizabeth I’s bodies, side by side with the original effigy bodies in Westminster Abbey:


Some close ups of the bodies when mounted on an inflatable mannequin:


The completed bodies, when on an inflatable mannequin that is small enough to fit them, measure:
Bust: 71.5cm / 28″
Waist: 55cm / 21.5″
Or roughly the equivalent of a AU/UK size 4 / US size 0 / Euro size 32… or in other words: TINY!
Afterthoughts
There are many things I would change if I were to make these again, many of which I’ve mentioned in my previous blog posts, but I’ll outline the most important here. Firstly, I would have used a linen as a lining for the bodies, as besides the fustian used in the original, this is what was most commonly used in other seventeenth century examples. Anne of Demark’s wardrobe records show that she preferred her bodies to be lined with taffeta, which is why my option to use it is historically justifiable. However, with that said I haven’t noticed any disadvantage in terms of fabric strength or durability (so far) to using taffeta. Yet, lining the bodies, which sit so close to the human body which perspires, with a fabric like linen would be the better choice for a garment intended for daily use.
I would also have sewn the bodies entirely in silk thread, and used a back stitch for all the boning channels, not a running stitch (as the original have) and then a half-back stitch as I ended up doing for the last panel.

Some of the readers of this blog have asked why I chose to use plastic whalebone instead of more period accurate materials like bents or cane. For my location and my budget, bents (a type of reed) were far too hard to source. Cane can be quite large and round or thick, and would not have been small enough to replicate the 6mm wide boning channels of the original. When recreating a later pair of American seventeenth-century stays for Pilgrim Hall in Plymouth, Massachusetts, stay maker Hallie Larkin noted that “These stays would have been extremely difficult to make without the artificial whalebone, wood products cut to 4mm would have a tendency to break or bend especially in the long channels at center front and back.” The thick nature of most available cane means that they also would have taken up much more fabric in the boning channels and therefore shrunk the bodies, more than the 1-2mm deep x 5mm wide plastic boning did. Plastic boning not only replicates the size and shape of the original cut baleen in bodies and stays, but it is flexible, molds to the body after time (as baleen did) and is just generally easier to work with.

Other lovely readers have also informed me of other ways to create the eyelet holes when I don’t have a bodkin. These include using different sized knitting needles to create a hole between the threads without breaking them, or to use a tailor’s awl. I hope to trial both these methods in my reconstruction of the Filmer Bodies c. 1630-50.

Overall I’m extremely happy with how the bodies turned out, considering this was my first time sewing a ‘corset’ of this style and doing it completely by hand. My next step is to find a model with body measurements small enough to fit into the bodies and test ideas of fit and movement.
they’re not made to fit anyone in particular? finding a model to fit once you’ve made them seems an odd arrangement.
I’m generally ok with corsets and bodies, but must admit these have never tempted me, they just look uncomfortable – too long
Hi there! Yes that’s correct, it may seem a tad counter productive, but the point of the exercise was to reconstruct the original as historically accurate as possible to learn about production but also about the body of the original owner, in this case Elizabeth I.
Sizing the bodies up would mess around with their dimensions, so they wouldn’t really be a true reconstruction.
(But I do have left over fabric so to appease the costumer in me I’ve decided to scale the pattern up and make myself a pair also… But I’ll be machine seeing those!)
She is on record as being approximately 5’7″ tall. After working with the garments, do you believe this to be correct?
Questions aside as to whether or not these were actually made for Elizabeth (they were constructed after her death for her funeral effigy, however, her usual tailor who made bodies for her in life made these too and within a short space of time between her death and her funeral, so if is quite probable that they are based on another pair that had previously been made for her). Yes I do! I have tried these on a petite friend and whilst they fit her well enough around the waist and bust (with an inch gap between the lacings) they were much too long in the torso for her. She is about 5’2″ so I definitely need someone taller or with a longer torso, maybe by 3″ or more
Thank you so much!
You’re welcome! I might actually write a post about it soon, so stay tuned 🙂