- Rebato, c. 1600-1625 Part One: Brief History and Materials
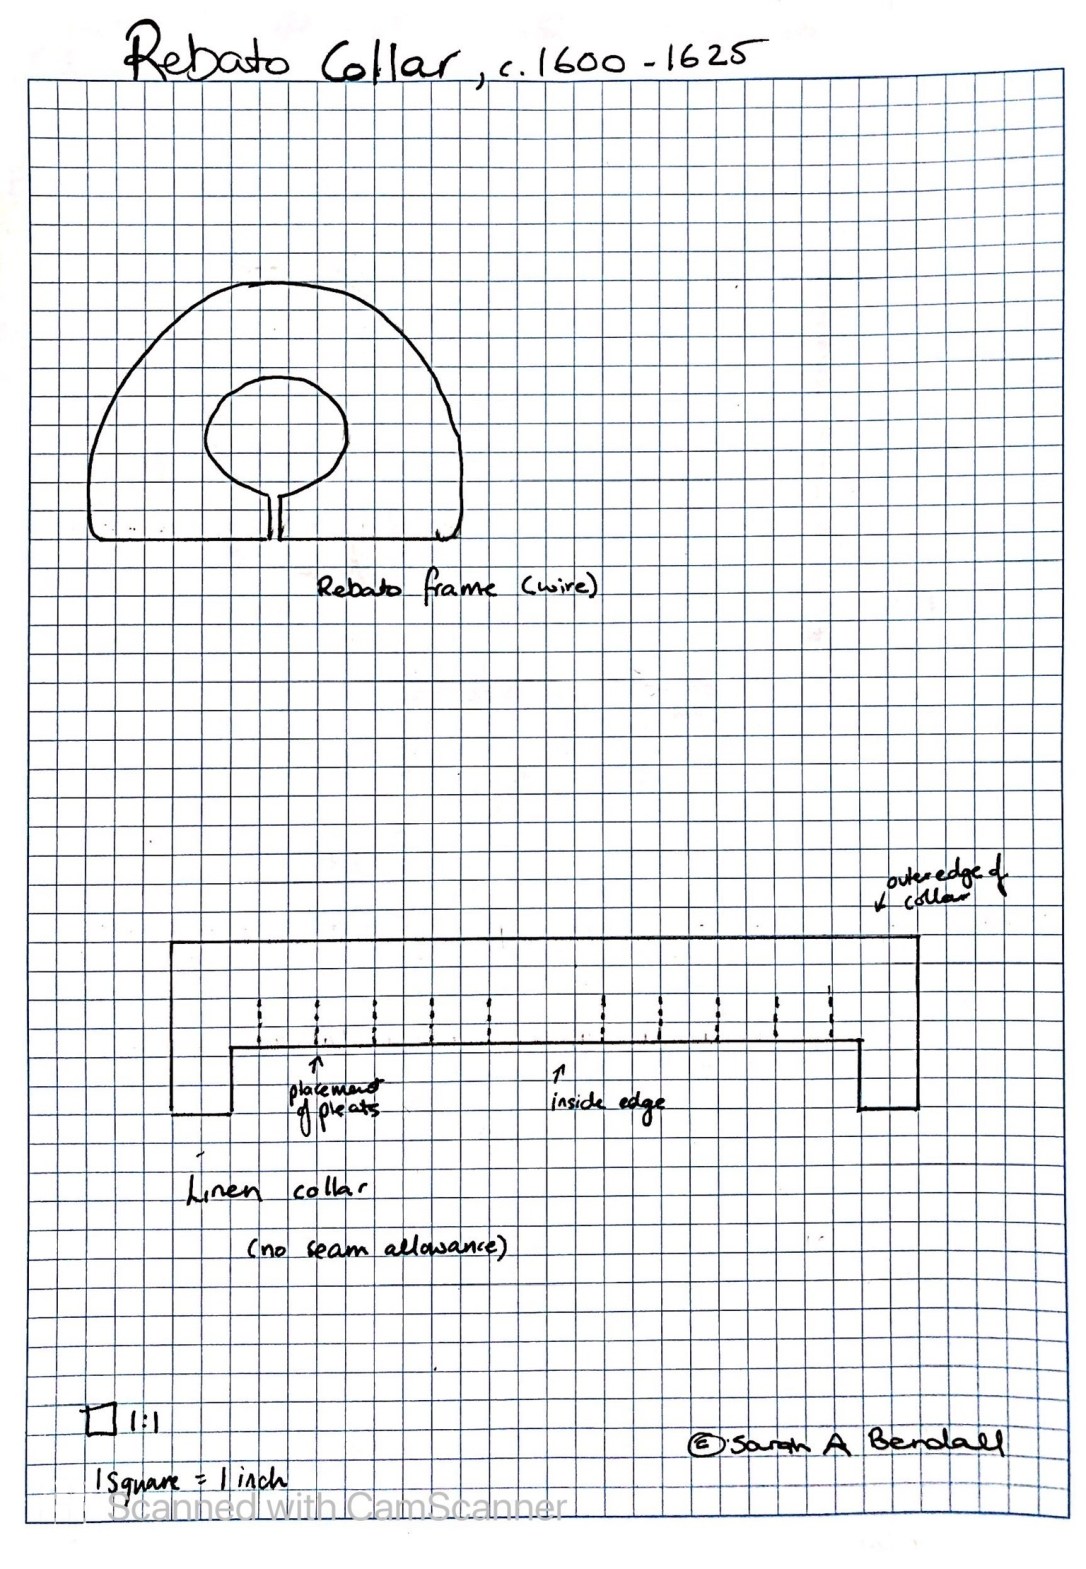
- Rebato, c. 1600-1625 Part Two: The Pattern
- Rebato, c. 1600-1625 Part Three: Making the Wire Frame
- Rebato, c. 1600-1625 Part Four: Making the Linen Collar
- Rebato, c. 1600-1625 Part Five: Finishing the Rebato

1. Pin the collar to the frame and check that it looks correct. Try it on!

2. Wrap fine wire around the outside edge of the frame, weaving in and out of the lace trim as shown.

3. Weaving the wiring in and out of the lace (every 2-3 points) to create ^ ^ ^ shapes will help the lace to stick out and maintain its shape.

4. Finish attaching the outer edge of the collar by whip stitching the linen to the metal frame.

5. Hem the inner edge of the collar. Pull the linen taught over the frame. Fold inner edge of linen collar over the inner edge of the frame and pin down.

6. Sew this inner edge down using a whip stitch.

7. Done! You can attach a little bit of ribbon (choose one that matches your outfit) to tie the sides together when wearing the rebato.
Finished Product